SHERIDAN, WYOMING – December 2, 2025 – Black and white photography has a magic of its own: once colour is stripped away, every line, shadow and highlight suddenly feels more emotional. With Canon’s professional printers and a few smart workflow habits, you can turn your favourite monochrome images into gallery-worthy prints right from home.
Why black and white printing feels different
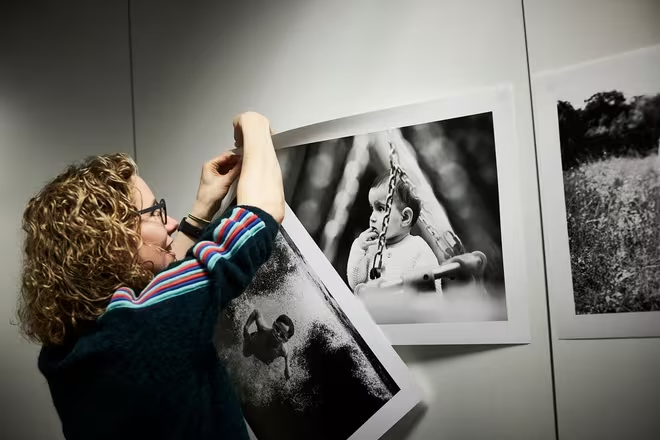
Black and white is all about intention. Without colour, your viewer’s eye goes straight to contrast, texture and shape – so any mismatch between screen and paper is instantly obvious. That’s why photographer Helen Bartlett, who delivers monochrome prints to her clients, spent a day learning how to print on Canon’s imagePROGRAF PRO Series instead of relying only on a studio. The goal: to keep all the mood and subtle detail she’d carefully crafted on screen.
Canon’s imagePROGRAF PRO printers are designed exactly for this challenge. With dedicated black inks, fine control over greys and support for a wide range of fine-art papers, they help you keep the emotion of your file intact from first click to final print.
Preparing your black and white images for print
Before you even hit “Print”, your screen needs to be honest with you. Canon printing specialist Frederic Vaneesbeck recommends calibrating your monitor to 6500K, matching Adobe RGB (1998), so what you see is suitable for print evaluation. Brightness matters too: set your screen between 80 and 120 cd/m² depending on your room lighting. If your workspace is bright, you’ll need a higher setting; in a dim room, lower is better.
Once your monitor is calibrated, you can think about paper and profiles. Canon’s free Professional Print & Layout (PPL) software lets you choose the correct ICC profile for each paper, whether that’s Pro Luster, Pro Platinum, Premium Matte or Fine Art Smooth. Each paper has its own whiteness and texture, so picking the right profile is essential if you want smooth highlights, deep blacks and gentle midtones.
If you’ve shot in colour or RAW, convert to black and white during processing but remember to convert back to RGB before printing. This ensures the printer can use its full ink set to reproduce every subtle tone in your monochrome image.
Soft proofing and Pattern Print: your secret quality weapons
Soft proofing is the step that can save you time, paper and ink. With a calibrated monitor, you can use the proofing options in your editing software to see how your photo will look on a specific paper. Adjust contrast, brightness and tones until the preview matches your creative intent, then save that version as a print-ready file.
Canon’s PPL plug-in brings everything into one place: printer choice, paper size, tray, borders and quality settings. Its Pattern Print feature is particularly powerful for black and white. It prints a contact sheet of 49 small variations of your image, each with different brightness and contrast values. By viewing this on the same paper you’ll use for the final print, you can simply pick the thumbnail that feels perfect and enter the settings printed beneath it.
3 simple steps to better black and white prints at home
- Match your environment: Calibrate your screen and view prints under a consistent light source, ideally around 5000K (daylight), so tones look the same in your workspace and on the wall.
- Pick the right paper: Glossy and luster papers give punchier blacks, while matte and fine-art papers offer a softer, more painterly feel – try both to see what suits your style.
- Use test prints wisely: A single Pattern Print sheet is far cheaper than a stack of full-size “almost right” attempts, and it helps you lock in repeatable settings.
Choosing the best Canon printer for monochrome work
If you’re mainly printing colour, Frederic notes that the Canon PIXMA PRO-200S is a fantastic option for semi-professional work. But for truly rich, museum-standard black and white, the Canon imagePROGRAF PRO-1100 and PRO-310 stand out. These imagePROGRAF PRO Series printers use both Photo Black and Matte Black inks, automatically choosing the right one based on your paper type so your blacks stay deep and your greys stay smooth.
Both the PRO-1100 (A2) and PRO-310 (A3+) use LUCIA PRO II pigment inks, offering enhanced image quality, durability and archival longevity of up to 200 years¹. The PRO-1100 features 12 inks; the PRO-310 uses 10. If you want to go even larger than A2, the same technology powers wide-format models like the imagePROGRAF PRO-2600, PRO-4600 and PRO-6600, perfect for statement prints.
Canon’s free Accounting Manager software helps you keep an eye on ink use and print costs, so creating big black and white prints stays manageable. And once your work is on the wall – lit with a good daylight-style bulb, as Canon’s team recommended to Helen – you really see the payoff: deep, nuanced monochrome prints that feel as timeless as the moments they capture.
Discover Canon’s imagePROGRAF PRO Series printers and tools for black and white photo printing at https://www.canon-europe.com.